%201.avif)


SPX 0DTE and Swing Trading — 10 Principles Built on the Three GammaEdge Pillars
.png)
Taylor Drake
.png)
May 18th, 2026
.png)
5 minutes
Most traders we meet are not beginners. They have a strategy, they have screen time, they have a few good years and a few painful ones. What they do not have, usually, is a clear answer to a simple question: where exactly does my trading edge come from?
That is the question this article is trying to help you answer, whether you are trading SPX 0DTE or swing trading equities over multiple sessions.
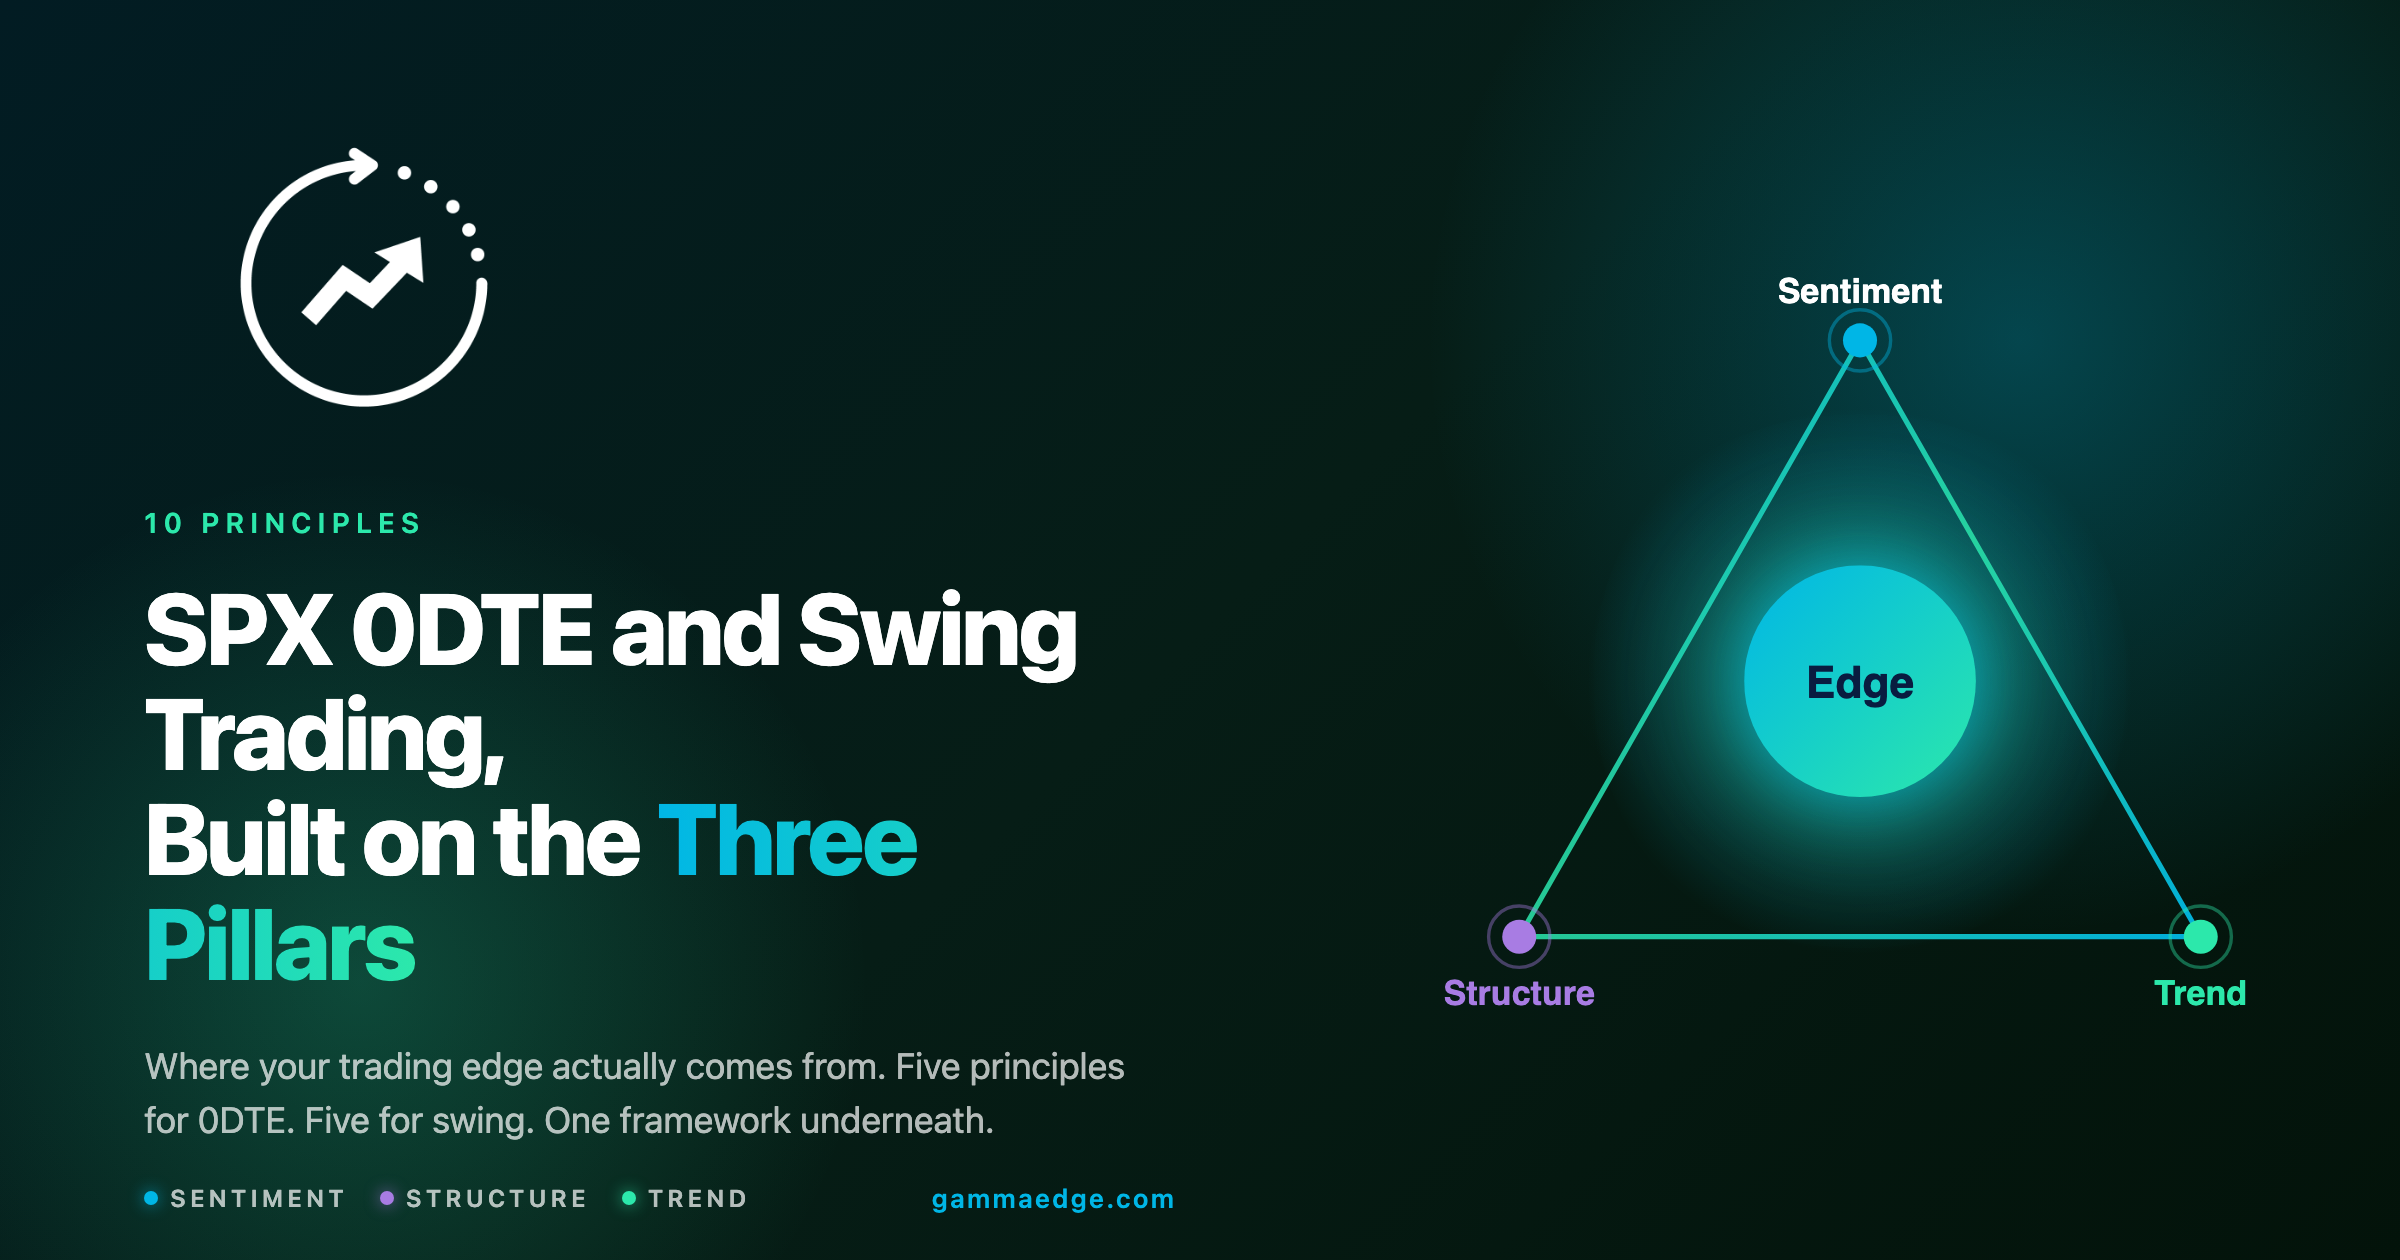
GammaEdge is built on three pillars:
No single pillar tells the whole story. The highest conviction setups happen when all three line up. That foundation is the same whether you are trading the next four hours or the next four weeks. What changes is how you deploy it.
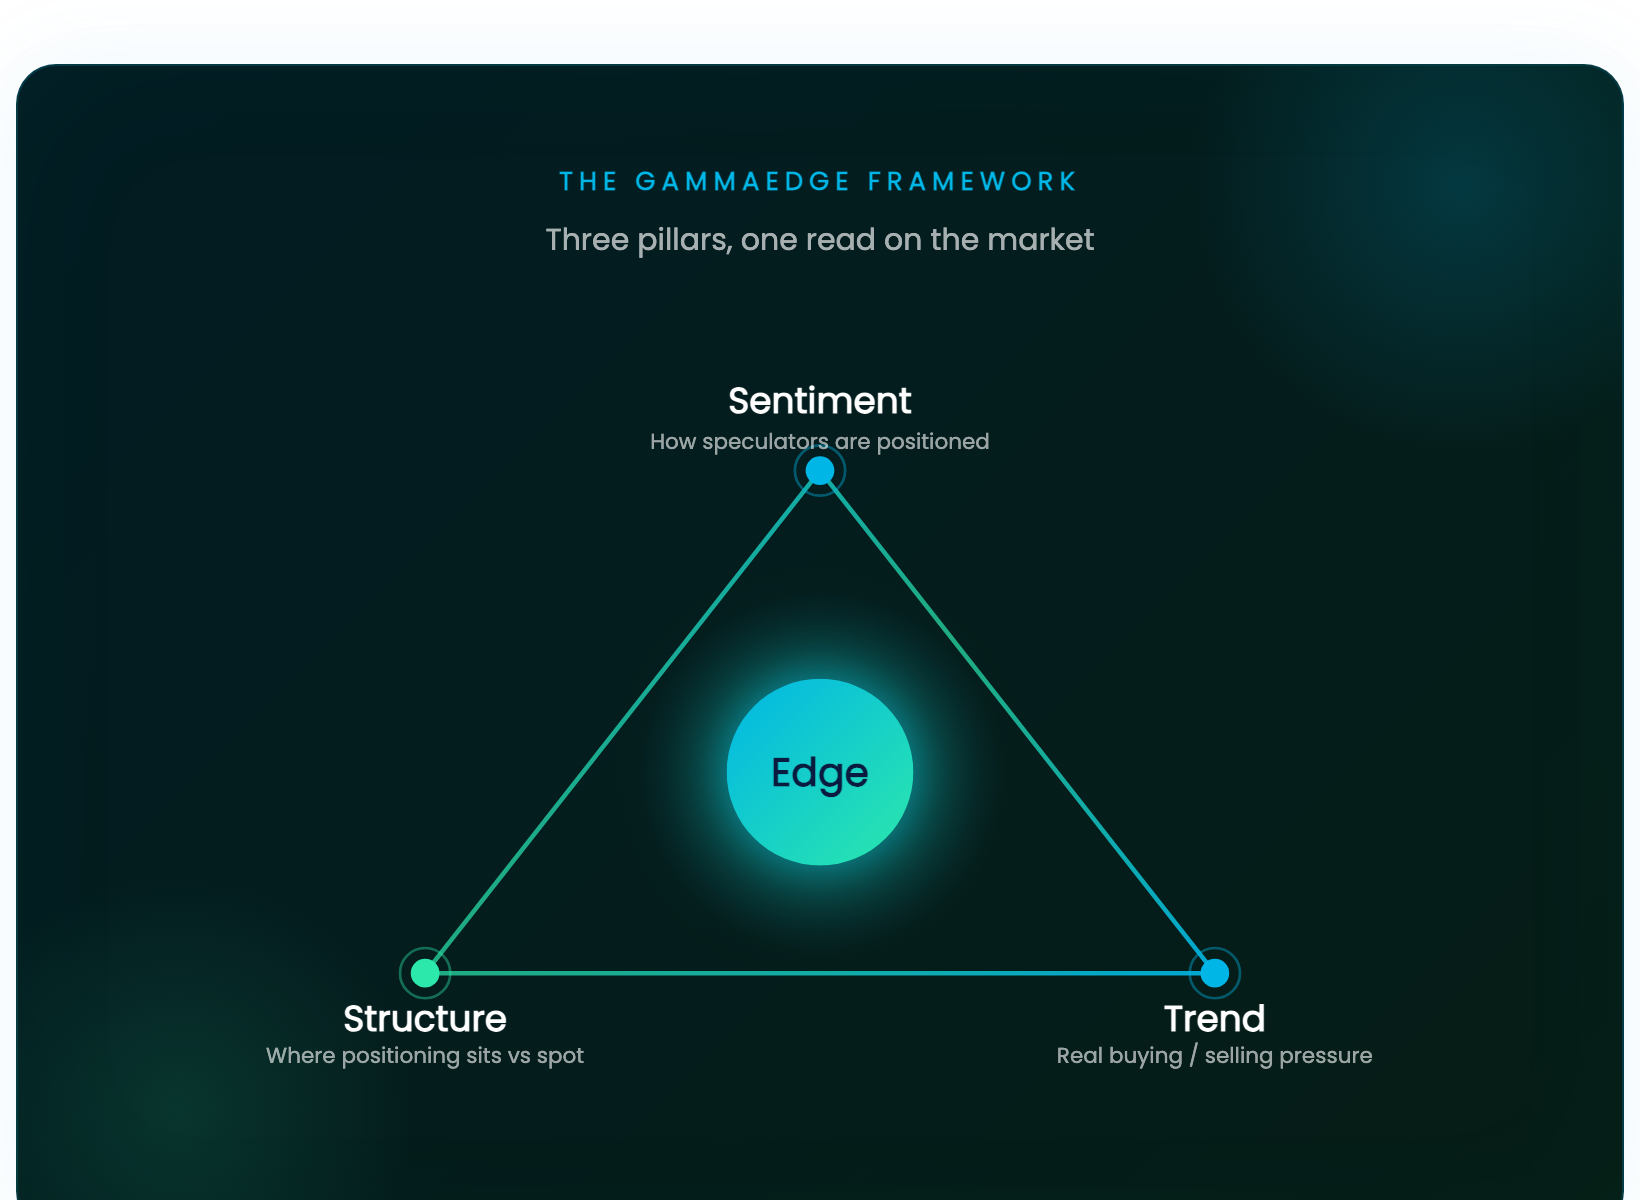
Which is why what follows is split. Five principles for SPX 0DTE traders, five for swing traders. Same framework, different application. The biggest mistake we see experienced traders make is treating a 0DTE setup like a swing setup, or sizing a swing position like a day trade. They look similar on the surface. They are different disciplines underneath.
If you read through these and find yourself nodding at most of them but pausing on one or two, that is useful information. The ones that make you pause are usually the ones telling you where your edge is leaking.
0DTE is a structural game. The map of the session, where the boundaries sit, is set before the bell rings. The job during the session is not to predict the next move. It is to navigate the map you built premarket, using intraday volume to confirm whether participants are respecting the structure or pushing through it.
These five principles describe how we approach it.
The single most common mistake we see in 0DTE trading is opening the chart, looking at price, and forming a directional bias before doing anything else. Price by itself does not tell you what kind of day you are walking into. Transition zones do.
A transition zone is the boundary between two different structural regimes. Above the upper transition, call positioning takes over and price tends to accelerate higher. Below the lower transition, put positioning takes over and price tends to accelerate lower. Inside the transition zone, structural forces are weak and price chops. The whole concept of GammaEdge is built around this idea: there is no edge trading inside the zone. The edge comes from identifying when price decisively exits the zone in either direction.
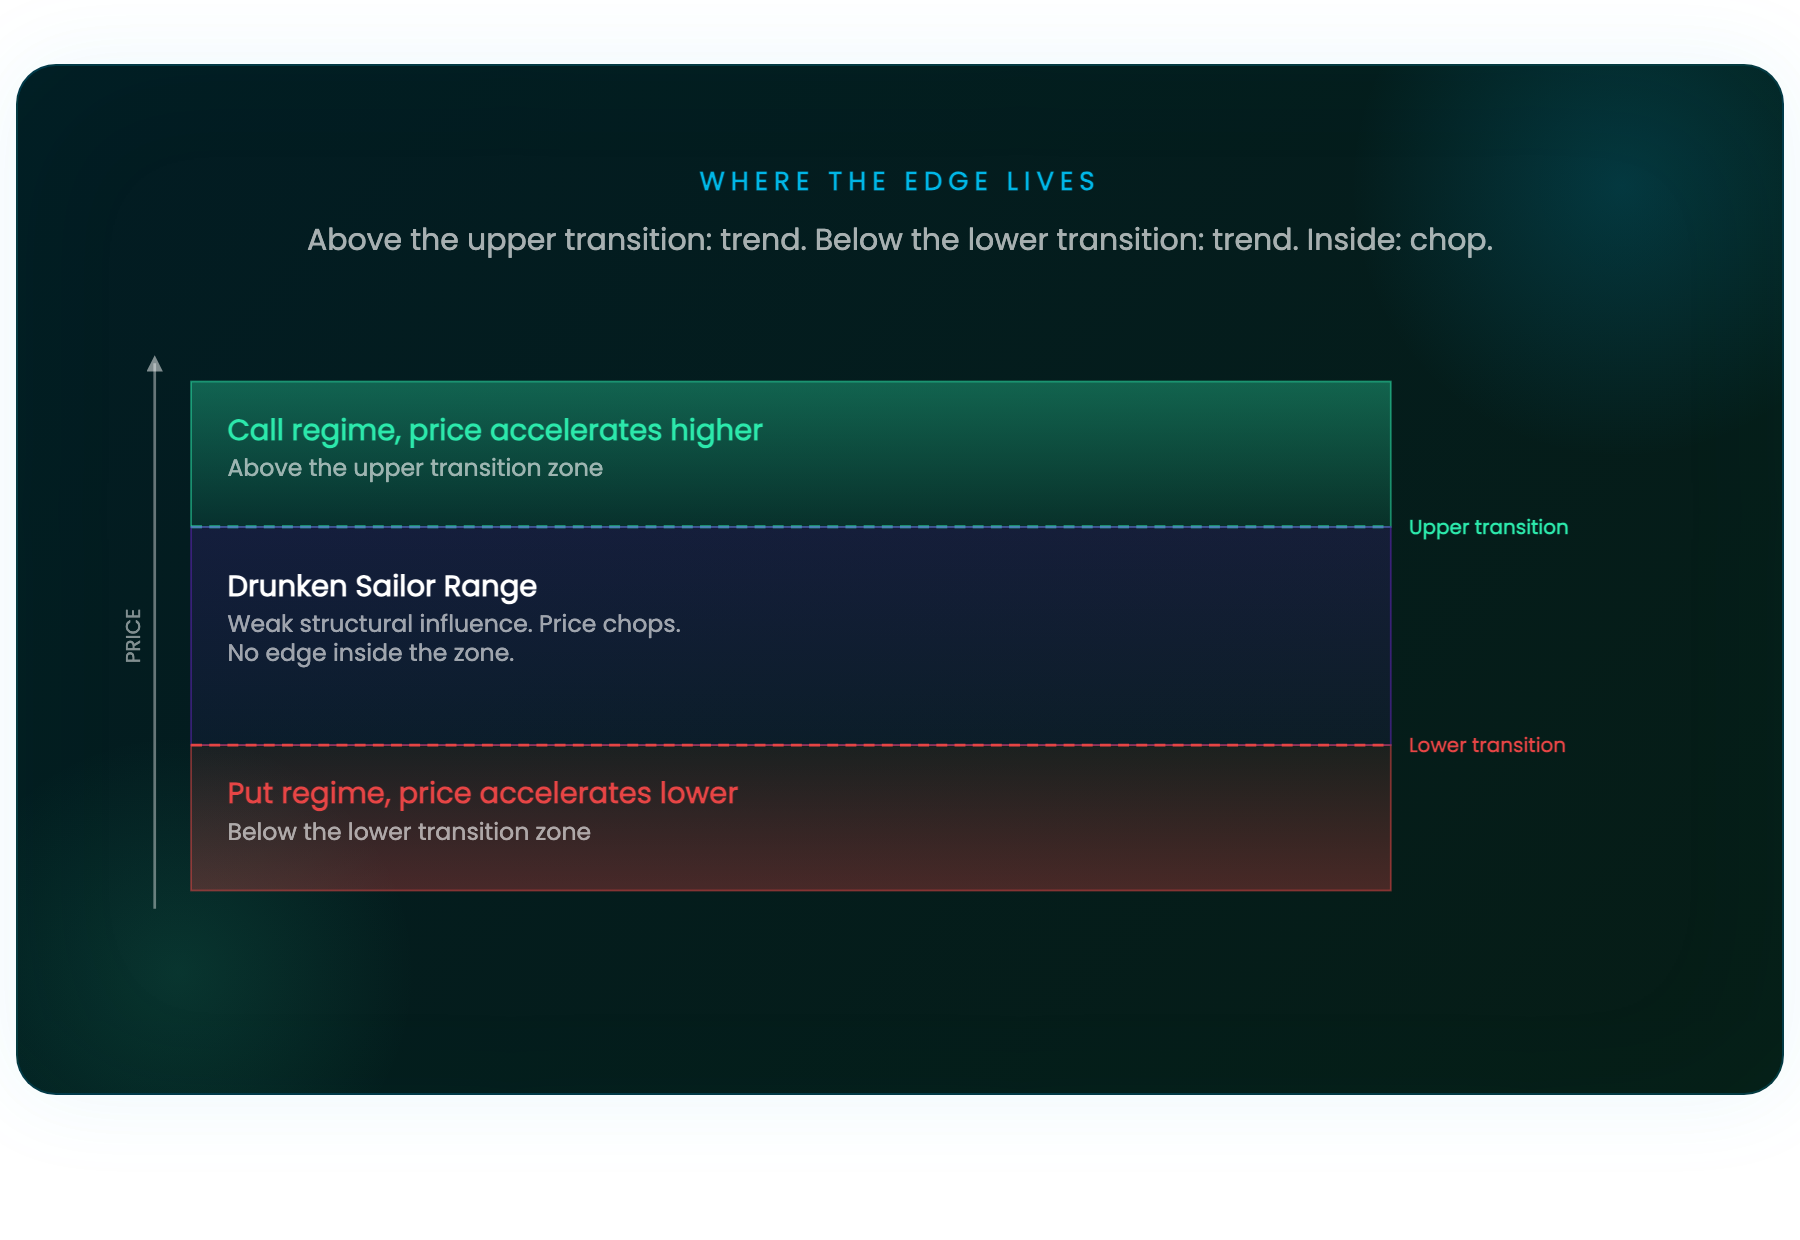
So the first thing we do every morning, before anything else, is map the structural boundaries of the session:
When the GEX and DEX transitions stack tightly together, that is a high conviction structural pivot. When they spread apart, the day is going to be choppier and you should size accordingly. The Drunken Sailor range tells you what happens once price breaks out of those boundaries: where it is likely to wander, where it stalls, where it accelerates.
This is not optional analysis. It is the foundation everything else in the session sits on. If you do not know where the boundaries are, every level you look at after that is floating in space. We have a dedicated article on transition zones if you want to go deeper on how to read them, but for the purposes of this article, the principle is simple. Find the boundaries first. Everything else comes after.
Transitions tell you where the boundaries are. Once we trade on either side of those, the next question that needs answers is what the terrain looks like once price exits the transition zone, because that determines whether a breakout runs, stalls, or reverses.
Different sessions have different terrain. The three patterns we look for every morning are bowls, gradients, and washboards. Each one tells you something different about how price will behave when it gets there. (For a full deep-dive on these three terrain types, see our upcoming bowls / washboards / gradients article.)
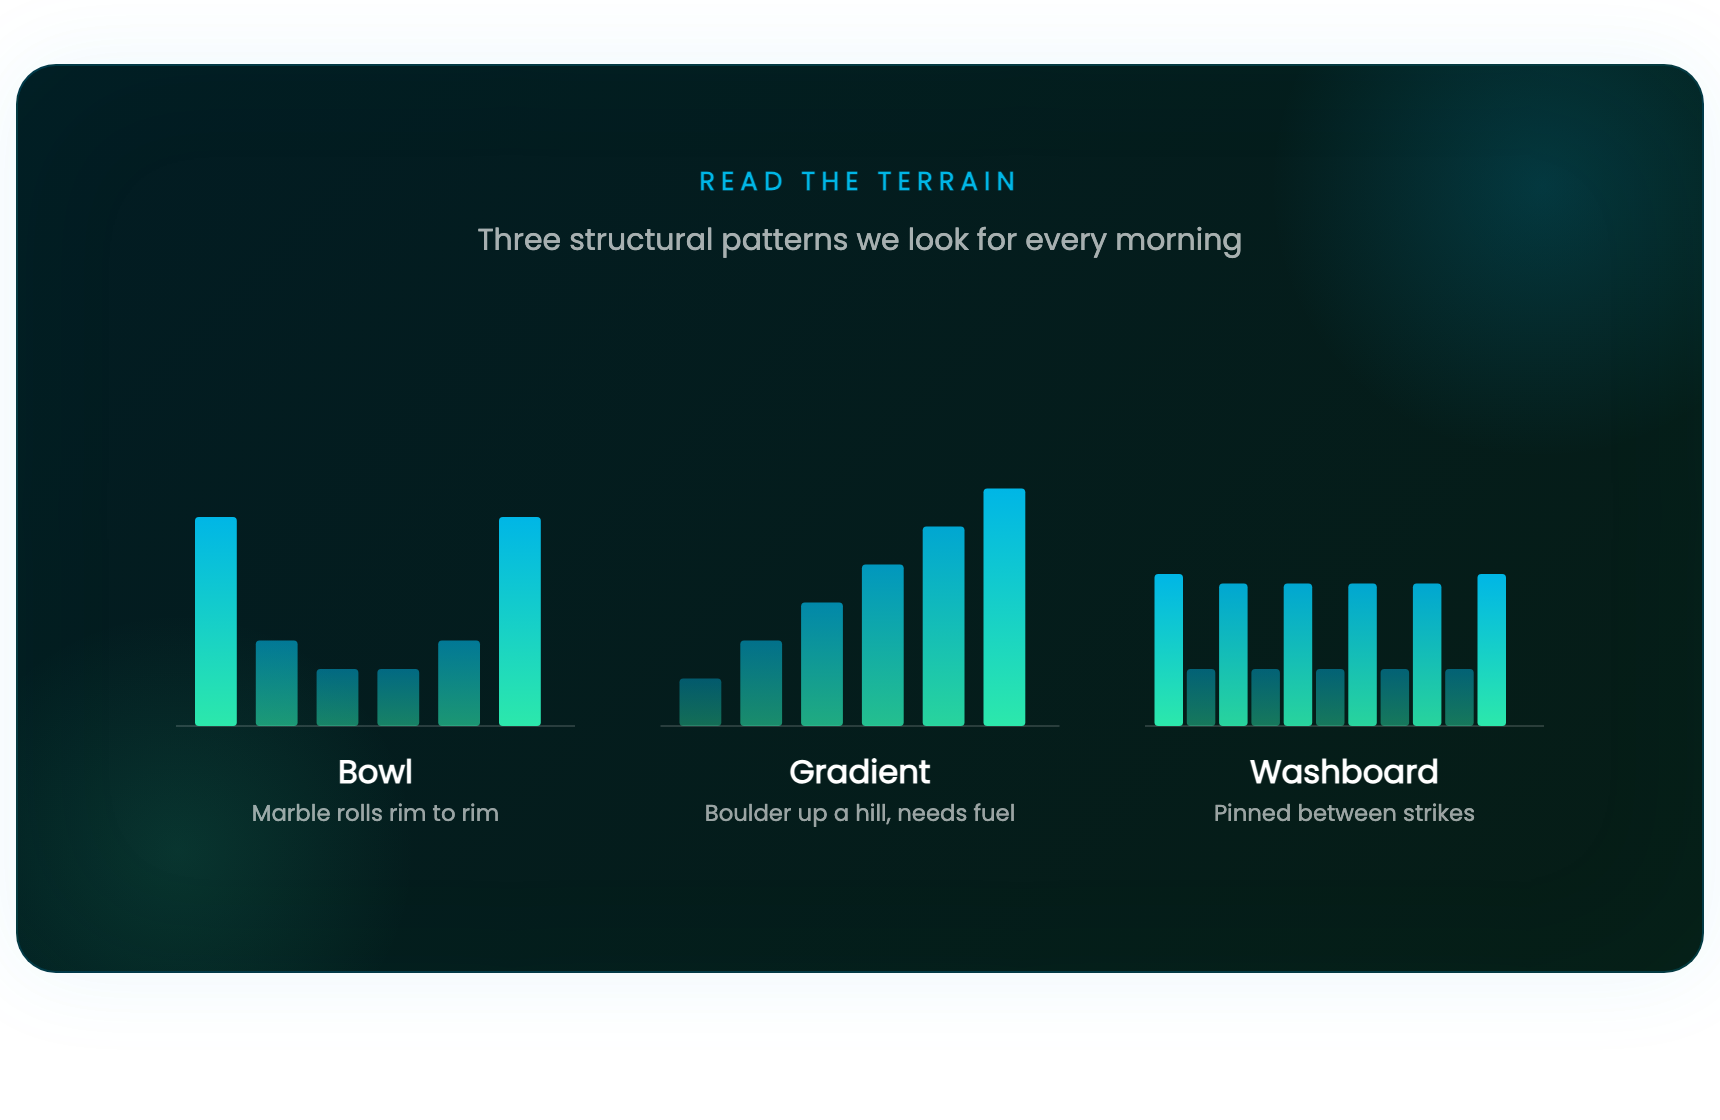
A bowl forms when there is meaningful positioning at two strikes with thin structure between them.
Once price clears the lower rim, the marble rolls toward the upper rim because the middle is not a destination. There is not enough structural friction to hold it. Bowls reward directional plays toward the rim. They punish trades that try to fade halfway through, because halfway through is exactly where the structure has nothing.
A gradient is a steady run of same-direction positioning that builds from one strike to the next. Five hundred contracts, one thousand, fifteen hundred, two thousand. Each step bigger than the last. The marble metaphor flips here. You are not rolling to a rim. You are pushing a boulder up a hill, and every step requires fresh fuel. The only way price gets up the gradient is if new speculation enters the market to push through each layer. Without that fuel, the slope wins, and the further up price gets, the harder the climb. Gradients reward fading failed attempts, not chasing breakouts.
A washboard is a series of small bowls stacked along the chain. Three or four strikes with meaningful positioning separated by weaker strikes in between. If a single bowl is one U, a washboard is U-U-U. Price falls into one of the cracks and gets pinned. There is a strike above where speculators want price to stay below it, and a strike below where speculators want price to stay above it. The pinning gets stronger as the day wears on because time decay compounds into the afternoon. Washboards punish directional plays. Spreads and iron condors fit better.
Once we have the boundaries from Principle 1 and the terrain mapped out, we build if-then statements for the session. If price holds above the upper transition and pushes into the gradient above, then we are looking long only if fresh volume is there to fuel the climb. If it stalls inside a washboard, then we are reaching for spreads instead of directional positions. If a bowl forms above the transition and the lower rim holds, then we play the marble rolling to the rim.
That is what premarket prep actually is. A read on the kind of terrain we are walking into and a written plan for how we react at each price level. When the bell rings, we are not figuring it out in real time. We are watching to see which scenario the market is choosing.
Structure is the map. Volume is whether the market is actually traveling that map today.
Most traders look at structure and stop there. They see a key level, they see price approaching it, they take the trade. Then the level fails and they wonder what happened. What happened is the volume was somewhere else. The level was structurally significant on paper, but the actual flow of buying and selling pressure was pointed in a different direction the whole time.
We have a robust suite of intraday volume analysis tools, and during the session we are specifically watching for a few things:
Structure sets the framework. Volume tells you whether the framework is being activated. Both have to be there. Without the volume read, structural levels are predictions about what should happen. With the volume read, you are watching what is actually happening and trading the gap between the two.
This is also the principle that catches a lot of experienced traders off guard. You can build the cleanest premarket plan in the world. If you stop checking the volume read once the bell rings, you are trading the structure as if it were the only thing that mattered. The structure was set. The volume tells you whether the market agrees.
The signals we use on 0DTE can change in five to ten minutes. A trigger day flips, a railroad track crosses, a clustering measure reverses, the cumulative tick rolls over, and the read that justified the trade an hour ago is no longer the read in front of you. That is the part most traders coming from longer timeframes underestimate. The framework demands presence because the framework operates on a fast clock.
This is where 0DTE separates itself from every other timeframe we trade. A swing position can be checked once or twice a day and managed on a multi-day cadence. A 0DTE position cannot. The whole point of the framework is that it gives you real-time reads on what the options complex is doing right now. If you are not in front of the screen, you are not actually using the framework. You are using a snapshot of it from when you left.
The two failure modes look different but rhyme. The first is set-and-forget. A trader takes the trade, walks away to a meeting, comes back two hours later. The structure has shifted. Volume has rolled over. The signal that supported the entry has reversed. The exit they should have taken at signal invalidation is now a much bigger loss. The second is half-attention. The trader stays at the desk but is splitting focus across email, chat, other charts. They see the position move against them but miss the structural break that should have triggered the exit. By the time they look up, the trade is no longer the trade. Both failure modes produce the same outcome. A position managed against an old read of the market.
If you cannot be present, there are two honest options. Pre-set hard stops and profit targets and let the trade run without you. Or do not take the trade at all. What does not work is being in the trade and only half-watching it. That is not engagement. That is hoping.
The toolkit demands presence because the toolkit operates on a fast clock. If your engagement window is wider than the framework's signal window, you are not actually trading the framework. You are looking at it.
This is the principle that shifts the article from preparation to execution. Everything before this is about reading the day. This one is about what you do the moment you click the trade.
Every 0DTE position needs a structural level between spot price and the point where the trade is wrong. Not a wish. Not a vibe. A specific level on the dashboard that, if broken, tells you the thesis is invalidated and the position needs to come off. If you cannot name that level before you enter the trade, you do not have an exit plan. You have hope.
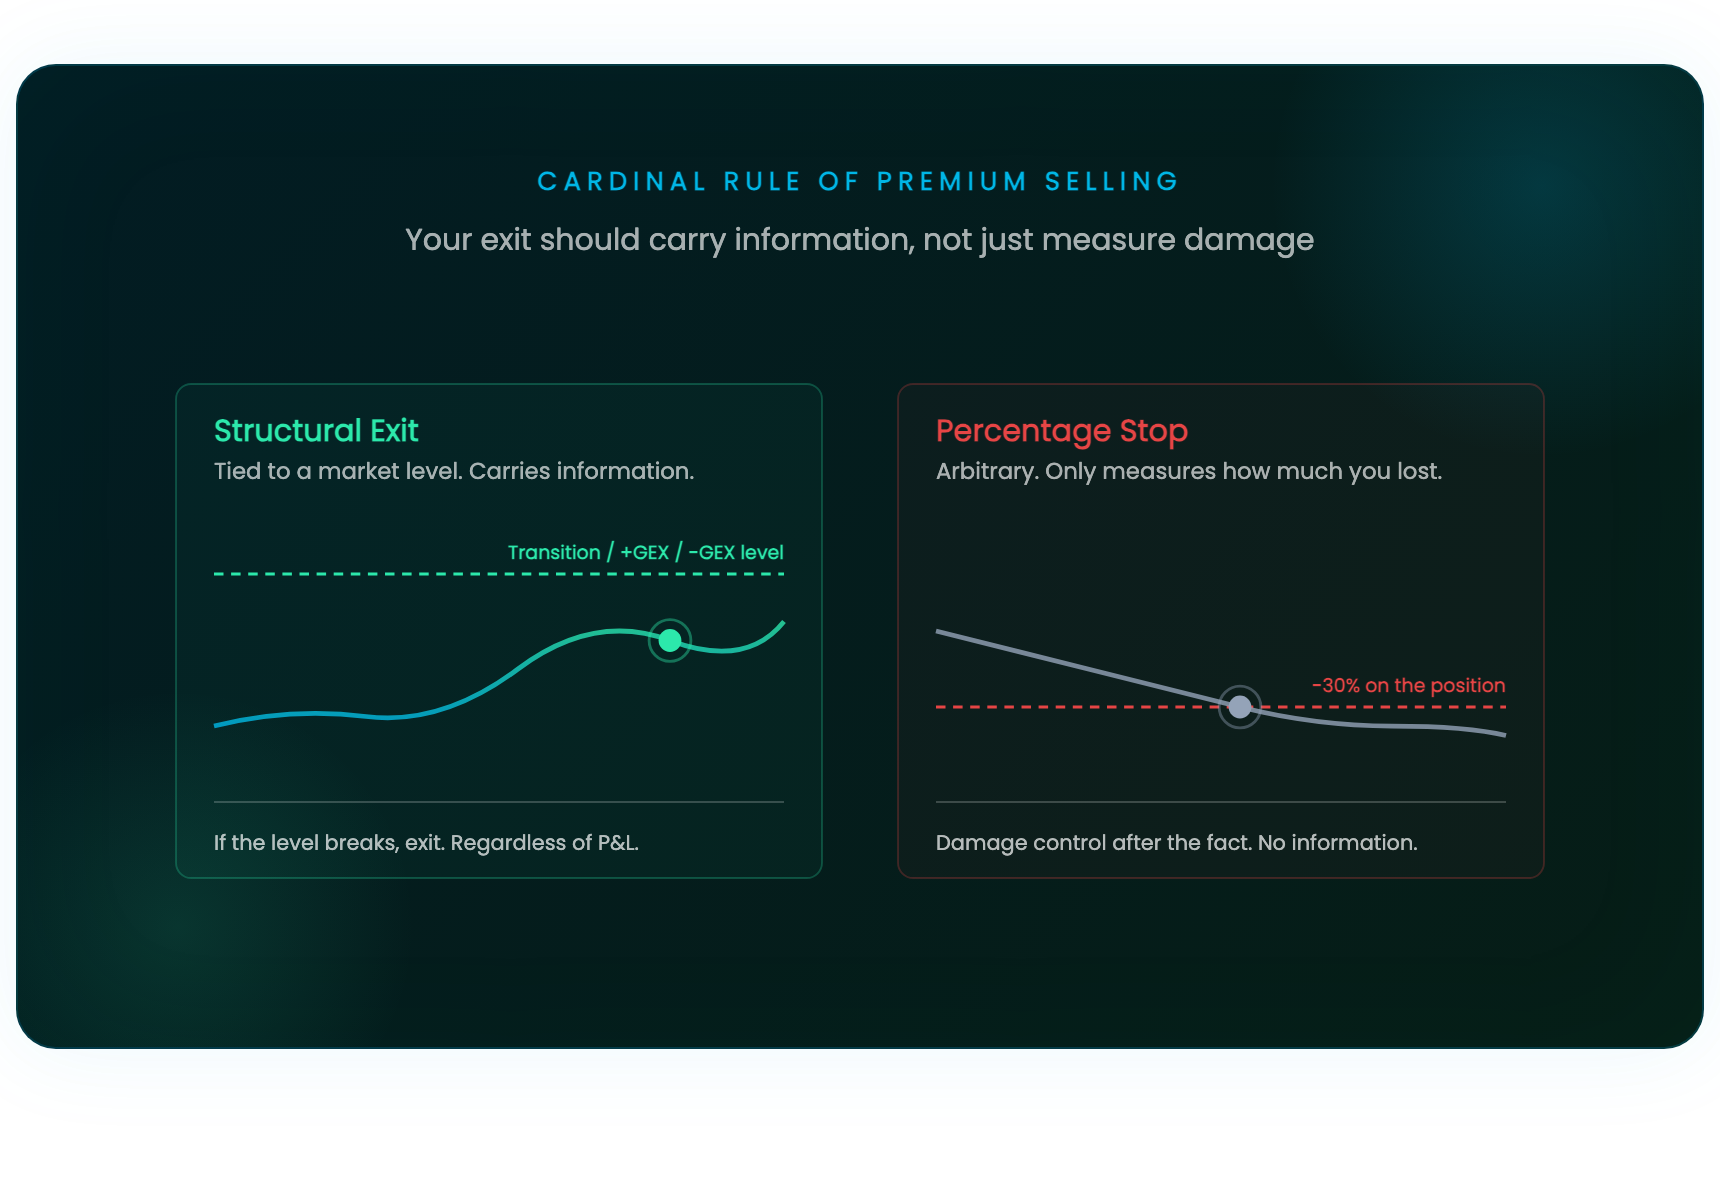
This is what we call the cardinal rule of selling premium. If you sell a put credit spread, there must be a structural feature between spot and your short strike. A transition zone level. A +GEX or -GEX level. Some piece of the structural map that has to break before your trade is actually under threat. That level becomes your trigger. If it gives way, you are out, regardless of what the position is doing on a P&L basis. The level is the exit, not the dollar amount. The same applies to long premium and spreads. If your thesis was that a transition would hold, the loss of that transition is your exit.
What this principle does not allow is the trade where the only exit is a percentage loss on the position. Percentage stops are arbitrary. Structure is not. A structural exit tells you something specific about what the market is doing. A percentage stop just tells you how much you have lost. One of those is information. The other is just damage control after the fact.
The practical test is simple. Before you take the trade, ask the question. What level has to break for me to be wrong? If you can answer it in one sentence with a specific number, you have a real plan. If you have to think about it, restructure the trade or skip it.
This is the bridge between everything we have talked about and actually putting on a position. The first four principles get you ready to trade. This one governs the trade once you are in it. Without it, the rest of the work does not matter.
Swing trading runs on a different clock. The signals do not move in five minutes. The position sits with you across multiple sessions and the structure underneath it shifts day by day.
Same framework. Different deployment. The Three Pillars are still the foundation. Sentiment, structure, and trend still need to line up. But the way you scale into a position, the way you read whether to engage at all, and the way you manage a trade that lives across days are all distinct from how you handle a session that ends at four o'clock.
These five swing trading principles describe how we approach it.
A swing position should work in your favor from the moment you put it on. Not eventually. Not after it has time to mature. From the first session.
This is one of the most useful frames we have for managing a fresh swing entry, and it is also one that most traders have never been told directly. The conventional wisdom on swing trades is that you give them room. You do not micromanage them. You let the thesis play out. That is true at a certain level, but it is also how a lot of swing traders end up holding losers for three weeks waiting for the chart to come back to them.
The frame we use is simpler. On day one, treat the position like a day trade. Watch it. If structure supports the thesis and price is moving in your favor, you are on the right side. If it is chopping sideways, you are getting useful information. If it is moving against you and the structural read that justified the entry is breaking down, that is information too.
A few things worth watching on day one of a swing entry:
The takeaway is not that you bail on a swing trade after one bad day. It is that day one is a checkpoint, not a freebie. A position that is not working from the start is more likely to keep not working, and treating each day as a fresh evaluation keeps you honest about what the trade is actually doing instead of what you hoped it would do.
This frame also feeds directly into the next principle. If every swing trade starts as a day trade, then the question of how big to be on day one is a real question, not a default. Which is what progressive exposure is for.
The principle most swing traders agree with in theory and violate in practice is that cash is a position. Almost everyone nods at it. Almost nobody actually lives it. The reason is that sitting out feels like doing nothing, and doing nothing feels like falling behind.
The fix is to stop treating "should I trade today" as a discretionary call.
The Market Trend Model is the gate. It tells us whether trend conditions support new swing entries or whether they do not. When the model is firing in our direction with confirmation, the gate is open and we engage. When it is off, weak, or showing conflicting signals, the gate is closed and we do not. There is no in-between version where we trade smaller, hedge it, or take the setup anyway because the chart looks pretty. Closed is closed.
This is what separates real capital preservation from the version most traders practice. Most traders define capital preservation as "trade smaller when conditions are bad." That is not preservation. That is participation with extra steps. Real preservation is sitting out entirely, holding cash, and waiting for the framework to tell you the conditions have changed. Cash earning a risk-free return while you wait is not opportunity cost. It is performance.
A few things worth being honest with yourself about when the gate is closed:
The hardest discipline in swing trading is not taking the loss. Most experienced traders cut losses fine. The hardest discipline is taking the boring trade, which sometimes means taking no trade at all. When the model says no, the answer is no. That is the principle.
The mistake on the other side of "sitting out" is going full size the moment the gate opens. The Market Trend Model fires, conditions look good, and the trader who has been waiting for two weeks deploys all of it on day one.
The framework does not work that way, and neither should you.
The way we approach this on the mechanical side is through our P2P strategy. When a signal fires on a given name, we put on a full position in that name. Full position does not mean full portfolio. It means a defined allocation per name, generally around 7% (this is what we use for the P2P position sizing), which is sized to keep any single trade from carrying outsized risk. The portfolio scales up not by adding more to existing positions but by adding more positions as more names meet the conditions to enter. In a weak environment, only a handful of signals fire and the portfolio stays mostly in cash. As conditions improve, more names trigger, more positions go on, and the portfolio gets pulled in by the breadth of the signals rather than the size of any single one.
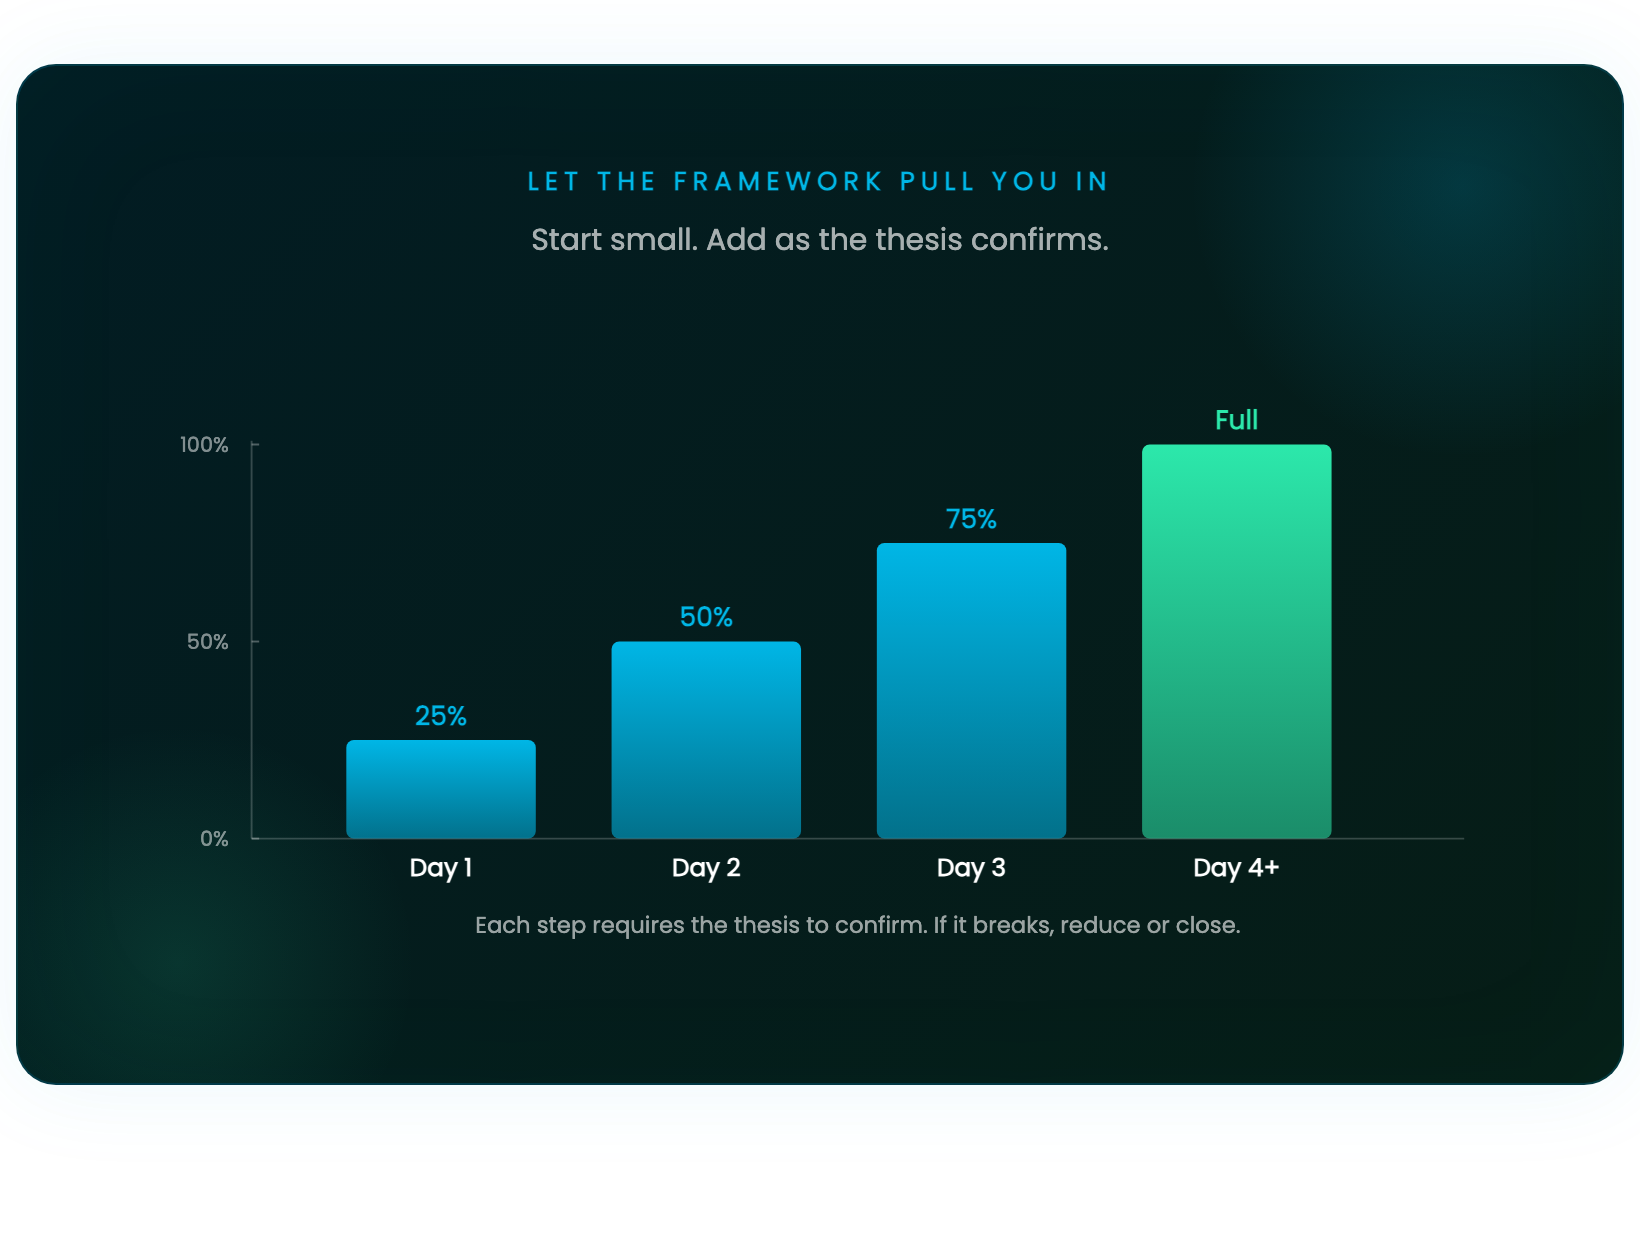
The principle translates to discretionary swing trading even though the mechanism is different. Most discretionary traders are not running a portfolio of dozens of names firing on mechanical signals. They are taking a smaller number of higher-conviction trades. For that style, progressive exposure means scaling into a single position over multiple sessions instead of adding more positions across more names. A reasonable starting frame is 25% on day one, scaling up as the next sessions either confirm or break the thesis. The exact percentages matter less than the principle. You are not trying to be right on day one. You are trying to participate in a way that lets the framework either pull you in deeper or shake you out cheaply.
The principle is simple enough to state in one line. Let the framework pull you in. The market will tell you whether the entry is real. Your job is to participate in a way that gives you upside if it works and minimal damage if it does not. Going full size on day one gets that backwards.
This is the principle most discretionary swing traders miss, and it is one of the sharpest things options market analysis brings to the table.
Most traders enter a swing position, write down the levels that justified the entry, and then anchor to those levels for the rest of the trade.
They use those reference points to manage the position for the next three, five, ten sessions, regardless of what the structure has done in the meantime.
Structure does not stand still. Speculation moves. Open interest builds and unwinds. Transition zones drift higher or lower as participants reposition. The +GEX that was your upside target on Monday might be gone by Wednesday because the calls that defined it were exited. The transition zone that supported your long entry might have shifted three strikes lower overnight because put speculation came in. The map you traded into is not the map you are still in.
The metaphor we use for this is sand washing away or building up beneath you. Some days the structural support underneath your position is getting stronger. New positioning is reinforcing the levels you traded into. Each session adds a layer. Other days the support is eroding. Speculation is rolling away from the strikes that mattered to your thesis. The level on the dashboard might still be there, but the conviction underneath it is hollowing out. You cannot see that by looking at price action. You can only see it by tracking the structural data day over day.
A few of the things we are watching as a swing position matures:
This is also the principle that makes options market analysis genuinely differentiated from price-only swing trading. A discretionary trader looking at a chart can see that price is still in the trade. They cannot see that the structure underneath has shifted. They are managing the position based on a map they drew at entry. We are managing it based on what the options complex is telling us right now.
The takeaway is one line. Use current levels, not entry-day levels. Anchoring to a structural map that no longer exists is one of the most expensive habits in swing trading, and it is invisible until the trade fails and you go back and realize the structure stopped supporting you three days before price did.
This is the principle that ties the whole article together.
Sentiment, structure, and trend. The Three Pillars from the opening are not just three different things to look at. They are three independent reads on the market, and the highest conviction setups are the ones where all three line up. When sentiment is bullish, structure is supporting price from below, and the trend model is firing in the same direction, you are looking at a setup where every piece of the framework is telling you the same story. Those are the trades worth pressing.
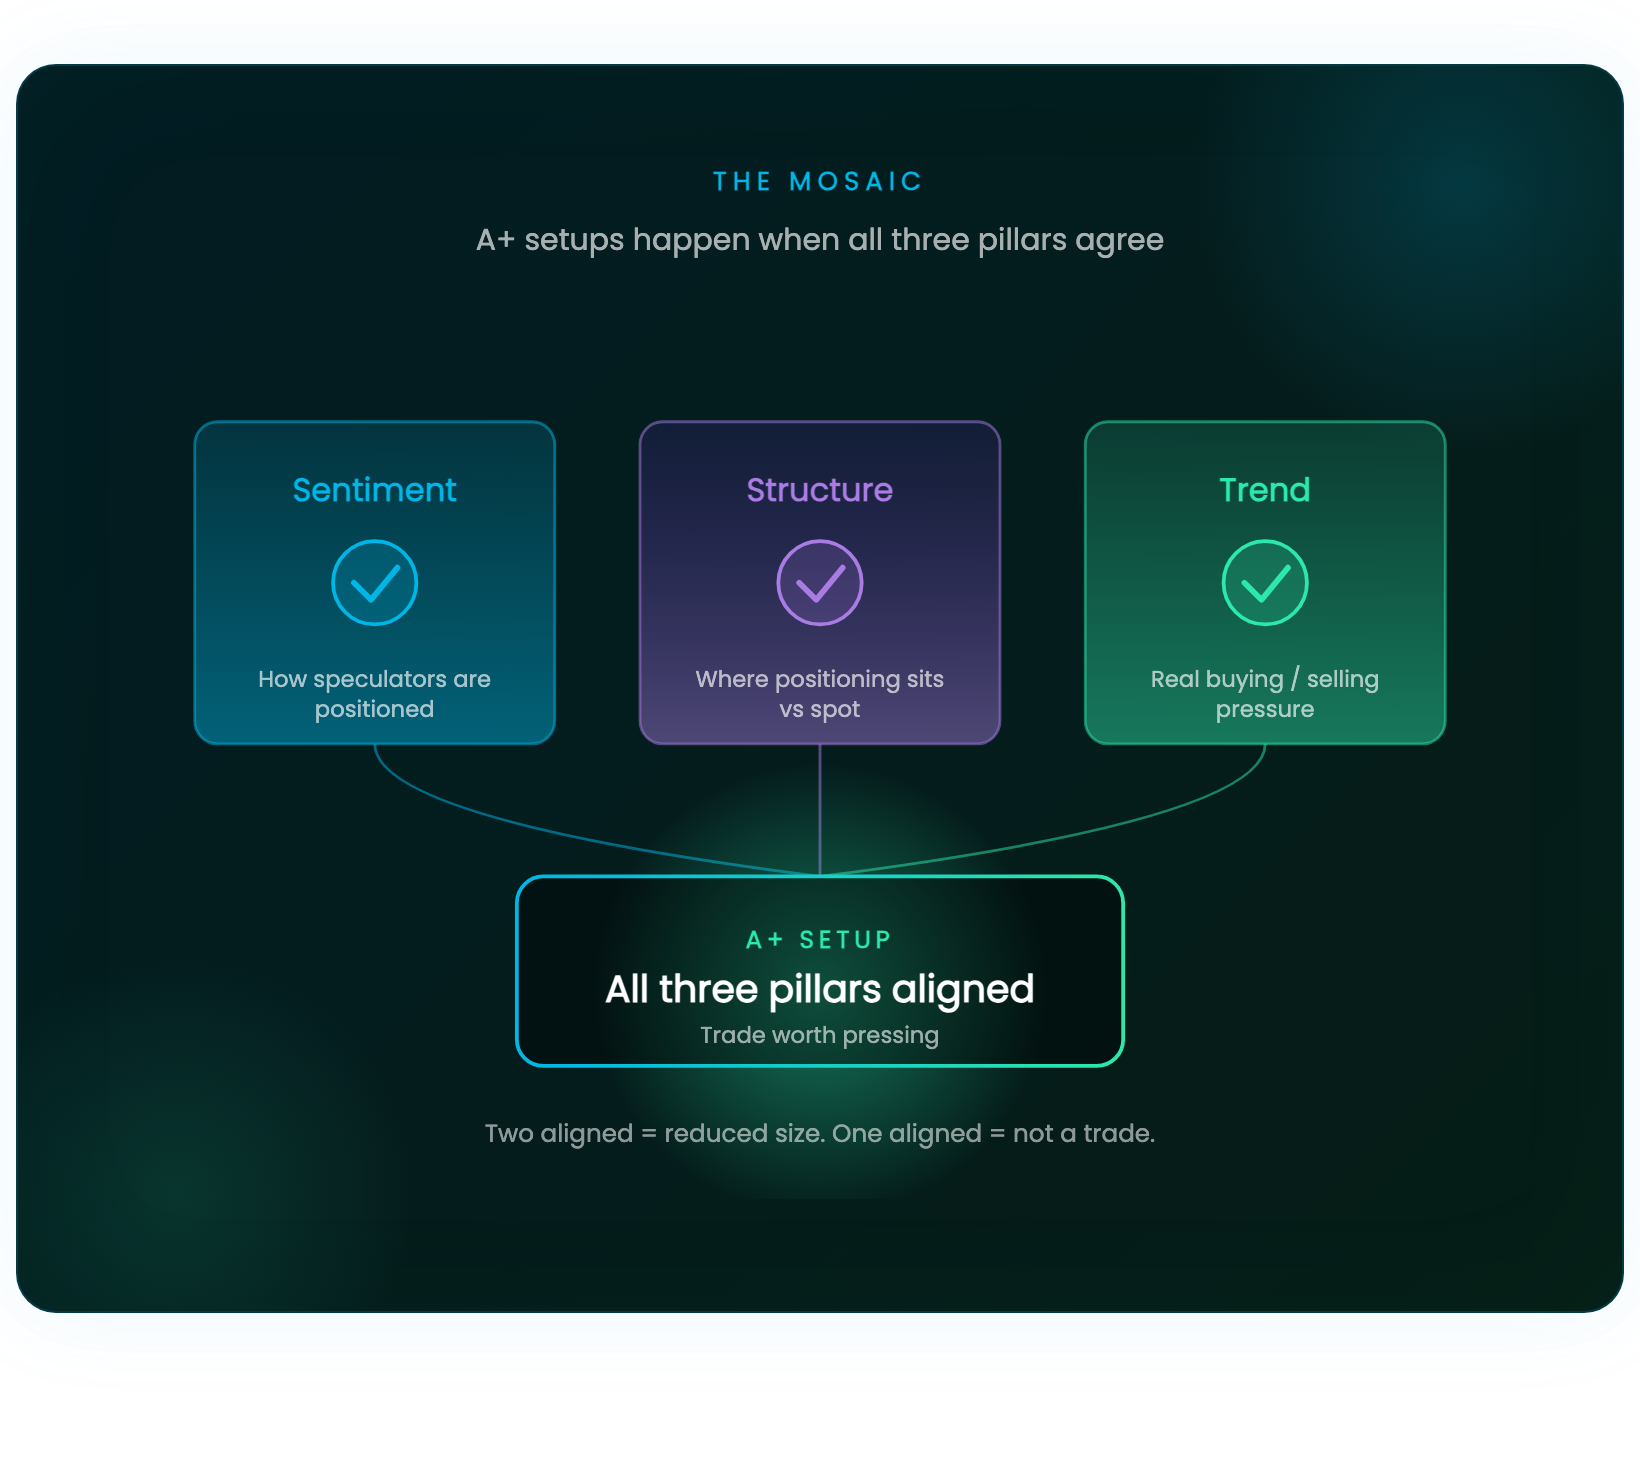
When the pillars conflict, the trade is not gone. The trade is smaller. Or it is not yours.
Most traders we meet rely on one signal. They have a chart pattern they trust, or an indicator they trust, or a flow read they trust, and they take the trade when that one signal fires. The problem is that any single signal is correct often enough to feel reliable and wrong often enough to bleed an account dry. The signal that worked five times in a row is the one you size up on right before it stops working. There is no individual indicator on earth that produces enough edge to overcome that pattern.
The mosaic is the answer. You do not get conviction from one signal getting better. You get conviction from multiple independent signals agreeing. When sentiment, structure, and trend are all pointing the same direction, you are not relying on any single read to be right. You are requiring three different windows into the market to corroborate each other before you commit. That is a fundamentally higher bar than what most traders trade against.
A few things worth being clear about with the mosaic:
That is the whole framework, distilled. Sentiment, structure, and trend. Each one a separate read. Each one capable of being wrong on its own. None of them capable of being wrong all at once. That is where edge actually lives.
Ten principles, two timeframes, one framework.
If you read all the way through, you may have noticed that the principles do not actually tell you what to trade. They do not tell you which way the market is going. They do not give you a setup or a signal or a level to watch. What they tell you is how to think about a market that is moving in real time and a framework that is built to read it.
There is a spine running through each side of the article that is worth naming.
On the 0DTE side, the spine is presence and structure. The map is built premarket. Volume confirms it intraday. Every trade has a structural exit named before you click the entry. None of that is about predicting price. It is about being prepared, being present, and reading what the structure is telling you in the moment.
On the swing side, the spine is rules over discretion. The Market Trend Model is the gate. Progressive exposure is the scale-in. Day-over-day structural reads are the manage. Mosaic alignment is the high-conviction green light. Discretion still matters. It just operates inside mechanical guardrails that do most of the heavy lifting for you.
Both spines lead back to the Three Pillars. Sentiment, structure, and trend. Whether you are trading the next four hours or the next four weeks, the framework is asking the same three questions. The deployment is what changes.
The principles you nodded at while reading are not the ones that matter. The ones that matter are the two or three that made you pause. The ones where you thought "I know that, but I do not actually do that consistently." That is where most experienced traders are leaking edge, and it is rarely because they do not know the principles. It is because they have not built the habits to live them.
Pick the one that hit hardest. Work on it this week. That is where the next layer of your edge is hiding.
Results require skill, time, discipline, and effort. GammaEdge provides structural context and analytical tools, not financial advice or guaranteed outcomes.